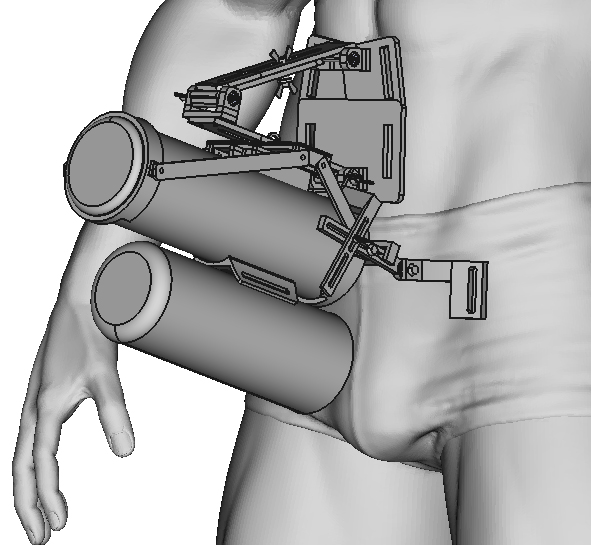
This is an additional attachment that allows you to stably hold the electric motor
The Handy tightly against your body without using your hands.
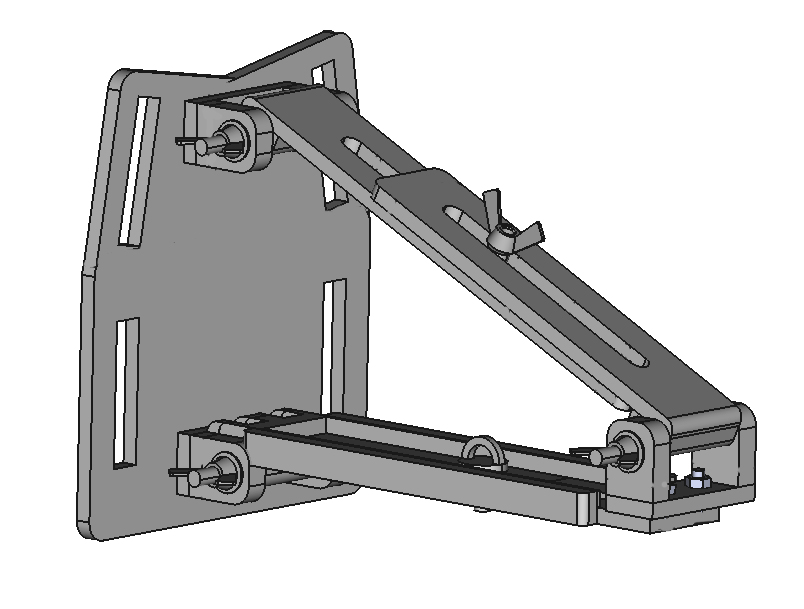
Added auxiliary stabilizing legs that spread from side to side at the bottom of the main body plate.
The position of the stabilizing legs can be freely changed using knob bolts for a better fit.
List of included items
Body plate x1
Hanging plate (for bearing attachment) reinforced version
Upper support plate, large and small, 1 each
Shaft support x 3 (+1 spare)
Rotation stopper parts x2
Stabilizing legs left and right, 1 each
Leg fixation auxiliary pillar × 2
Support pillar x2
Left and right connecting parts (does not need to be installed)
M3 bolt 12mm & nut x 6 each
M4 bolt 50mm x 2 60mm x 1
M4 wing nut x 6
M4 Spring seat and washer 6 sets
1/4 inch screw with D ring x 1
M6 thumbscrew & wing nut 1 set
M6 washer × 2
M3 thumbscrew 12mm x 2
M3 thumbscrew 16mm x 4
M3 wing nut x2
Sold separately: Fixed buckleless belt x 2 Please purchase on Amazon etc.
In principle, all the bolts used in our products are equipped with hexagonal wrench holes. For assembly, please prepare a hex wrench set, radio pliers, etc.
How to assemble
①Attach two shaft supports to the body plate using M3 bolts (12mm) and nuts. You can tighten it firmly.
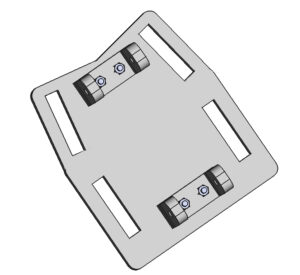
② Pass the M4 bolt, butterfly bolt, spring seat, washer,
and wing nut through the shaft support as shown in the diagram below and tighten lightly.
If you tighten too strongly without sandwiching the hanging plate or support plate,
the bearing may be damaged. Tighten it loosely, temporarily.

③Attach the bearing to the hanging plate (for mounting the shaft support) with bolts and nuts.
You can tighten it tightly.
Install the M4 bolt, spring seat, washer, and wing nut to the bearing as in ②.
This is also temporary and light.
Insert the 1/4 inch screw with D ring into the groove.
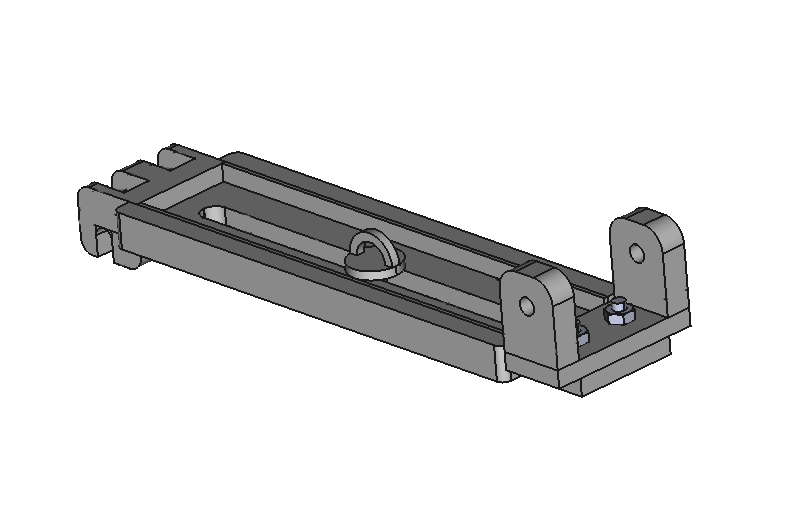
④ Fit the parts made in step ③ onto the body plate bearing in step ① from above and lightly tighten the wing nut. If it is difficult to fit, please file it down a little with a board file.
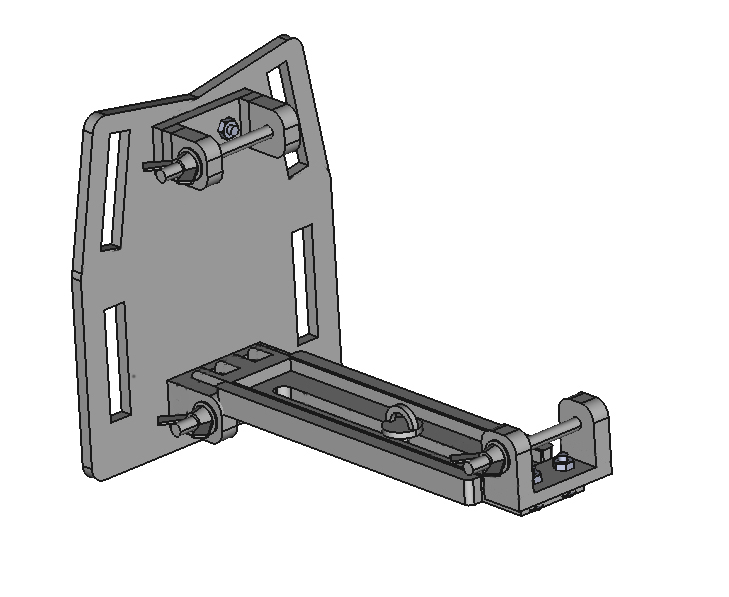
⑤ Connect the large and small upper support plates with an M6 wing nut,
two washers, and a wing nut.
The board can be oriented in any direction or up or down.
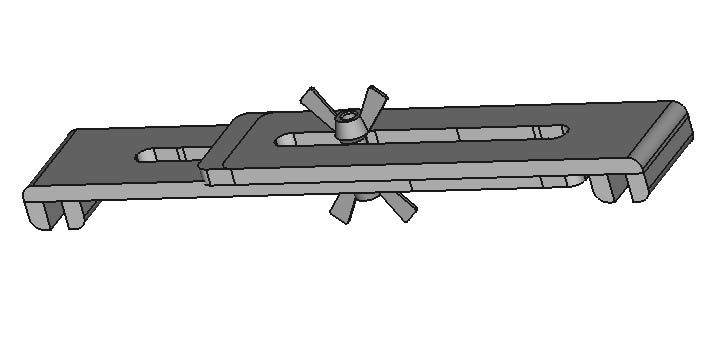
⑥ Attach ⑤ to the part made in ④ as shown in the diagram. The mounting direction, top and bottom of the board, etc. can be any way you like.
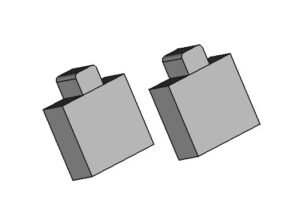
 Insert the rotation stopper into the mounting holder at the position shown below.
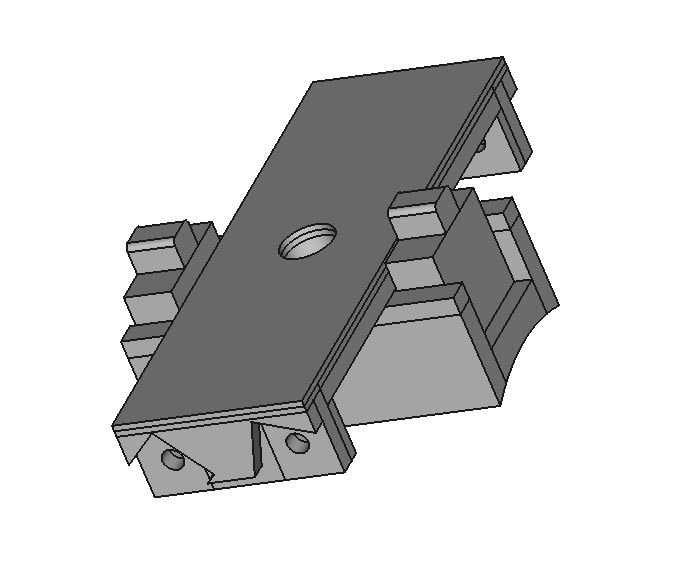
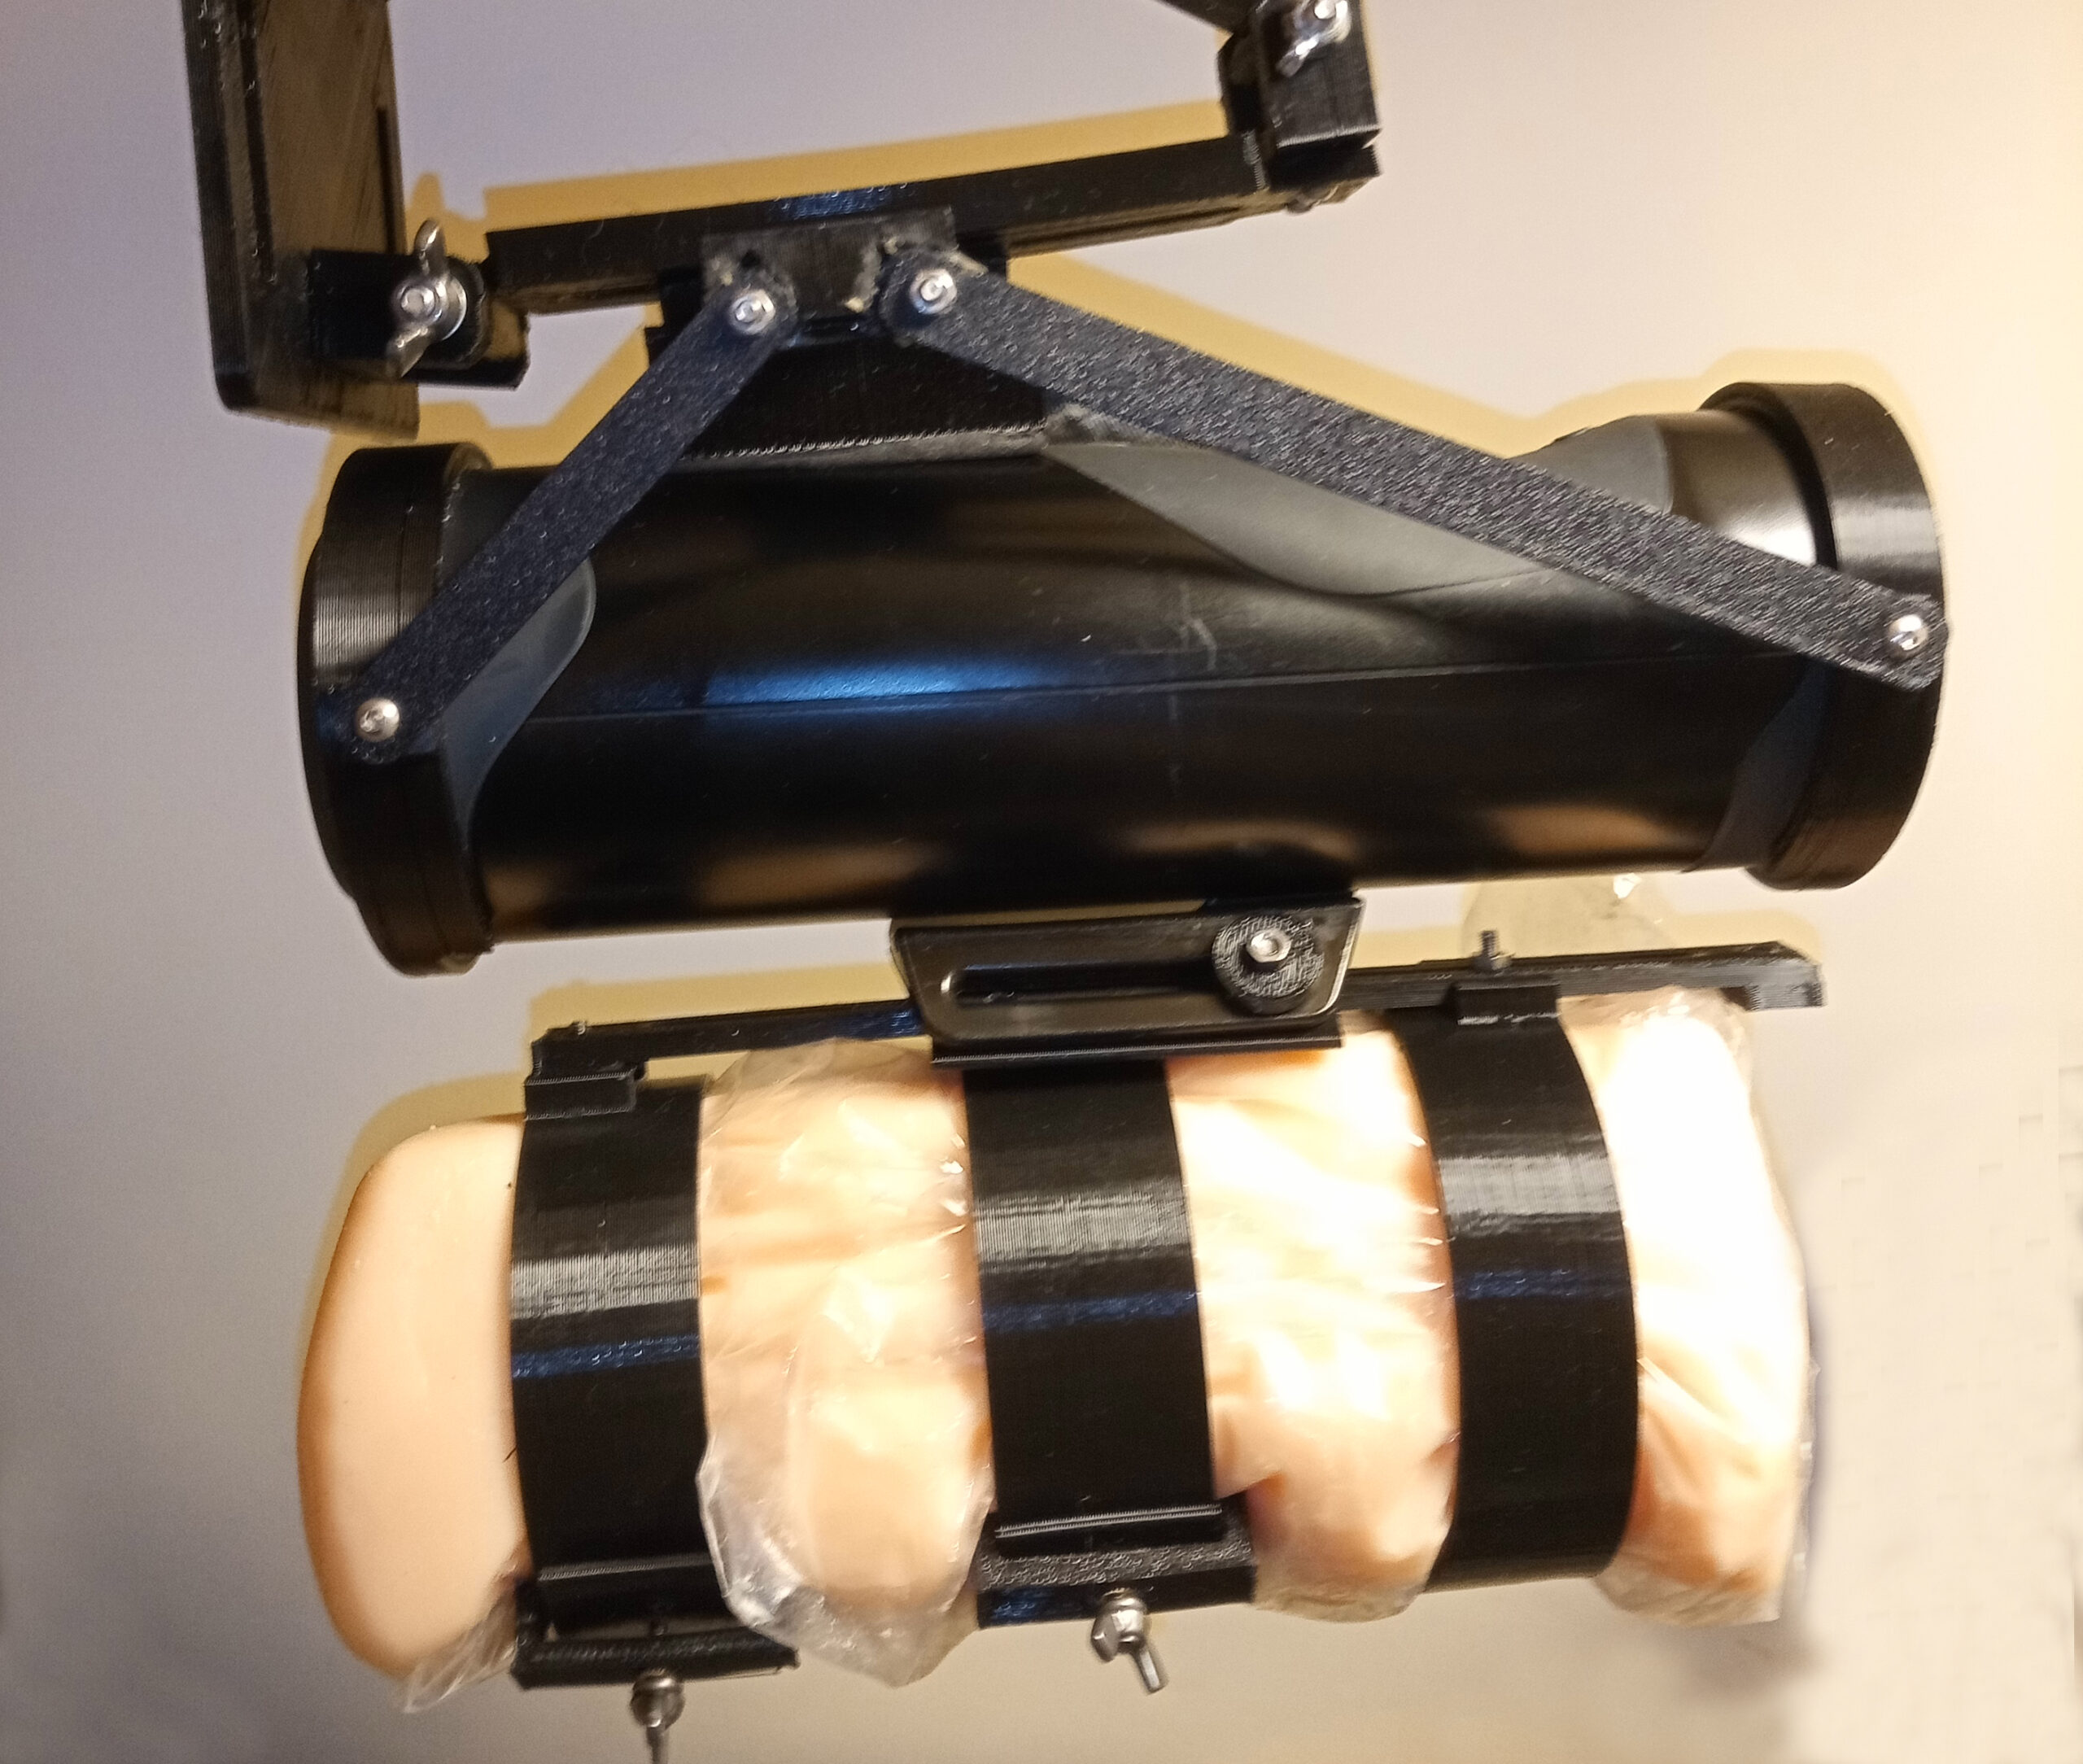
⑦ Fix “The Handy Mounting Holder” to the hanging board with a 1/4 inch screw. Pass the two buckleless belts through and secure it to your body.
⑧ Fix the leg fixing auxiliary pillars on the left and right sides of the stabilizing legs with M3 thumb bolts 12mm.
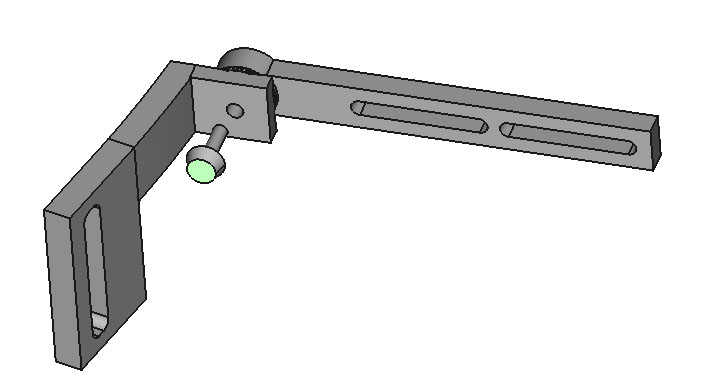
⑨ Remove the fixing M3 bolts originally attached to the mounting holder, and temporarily fix the parts made in ⑧ (left and right) using M3 thumb screws 16mm.
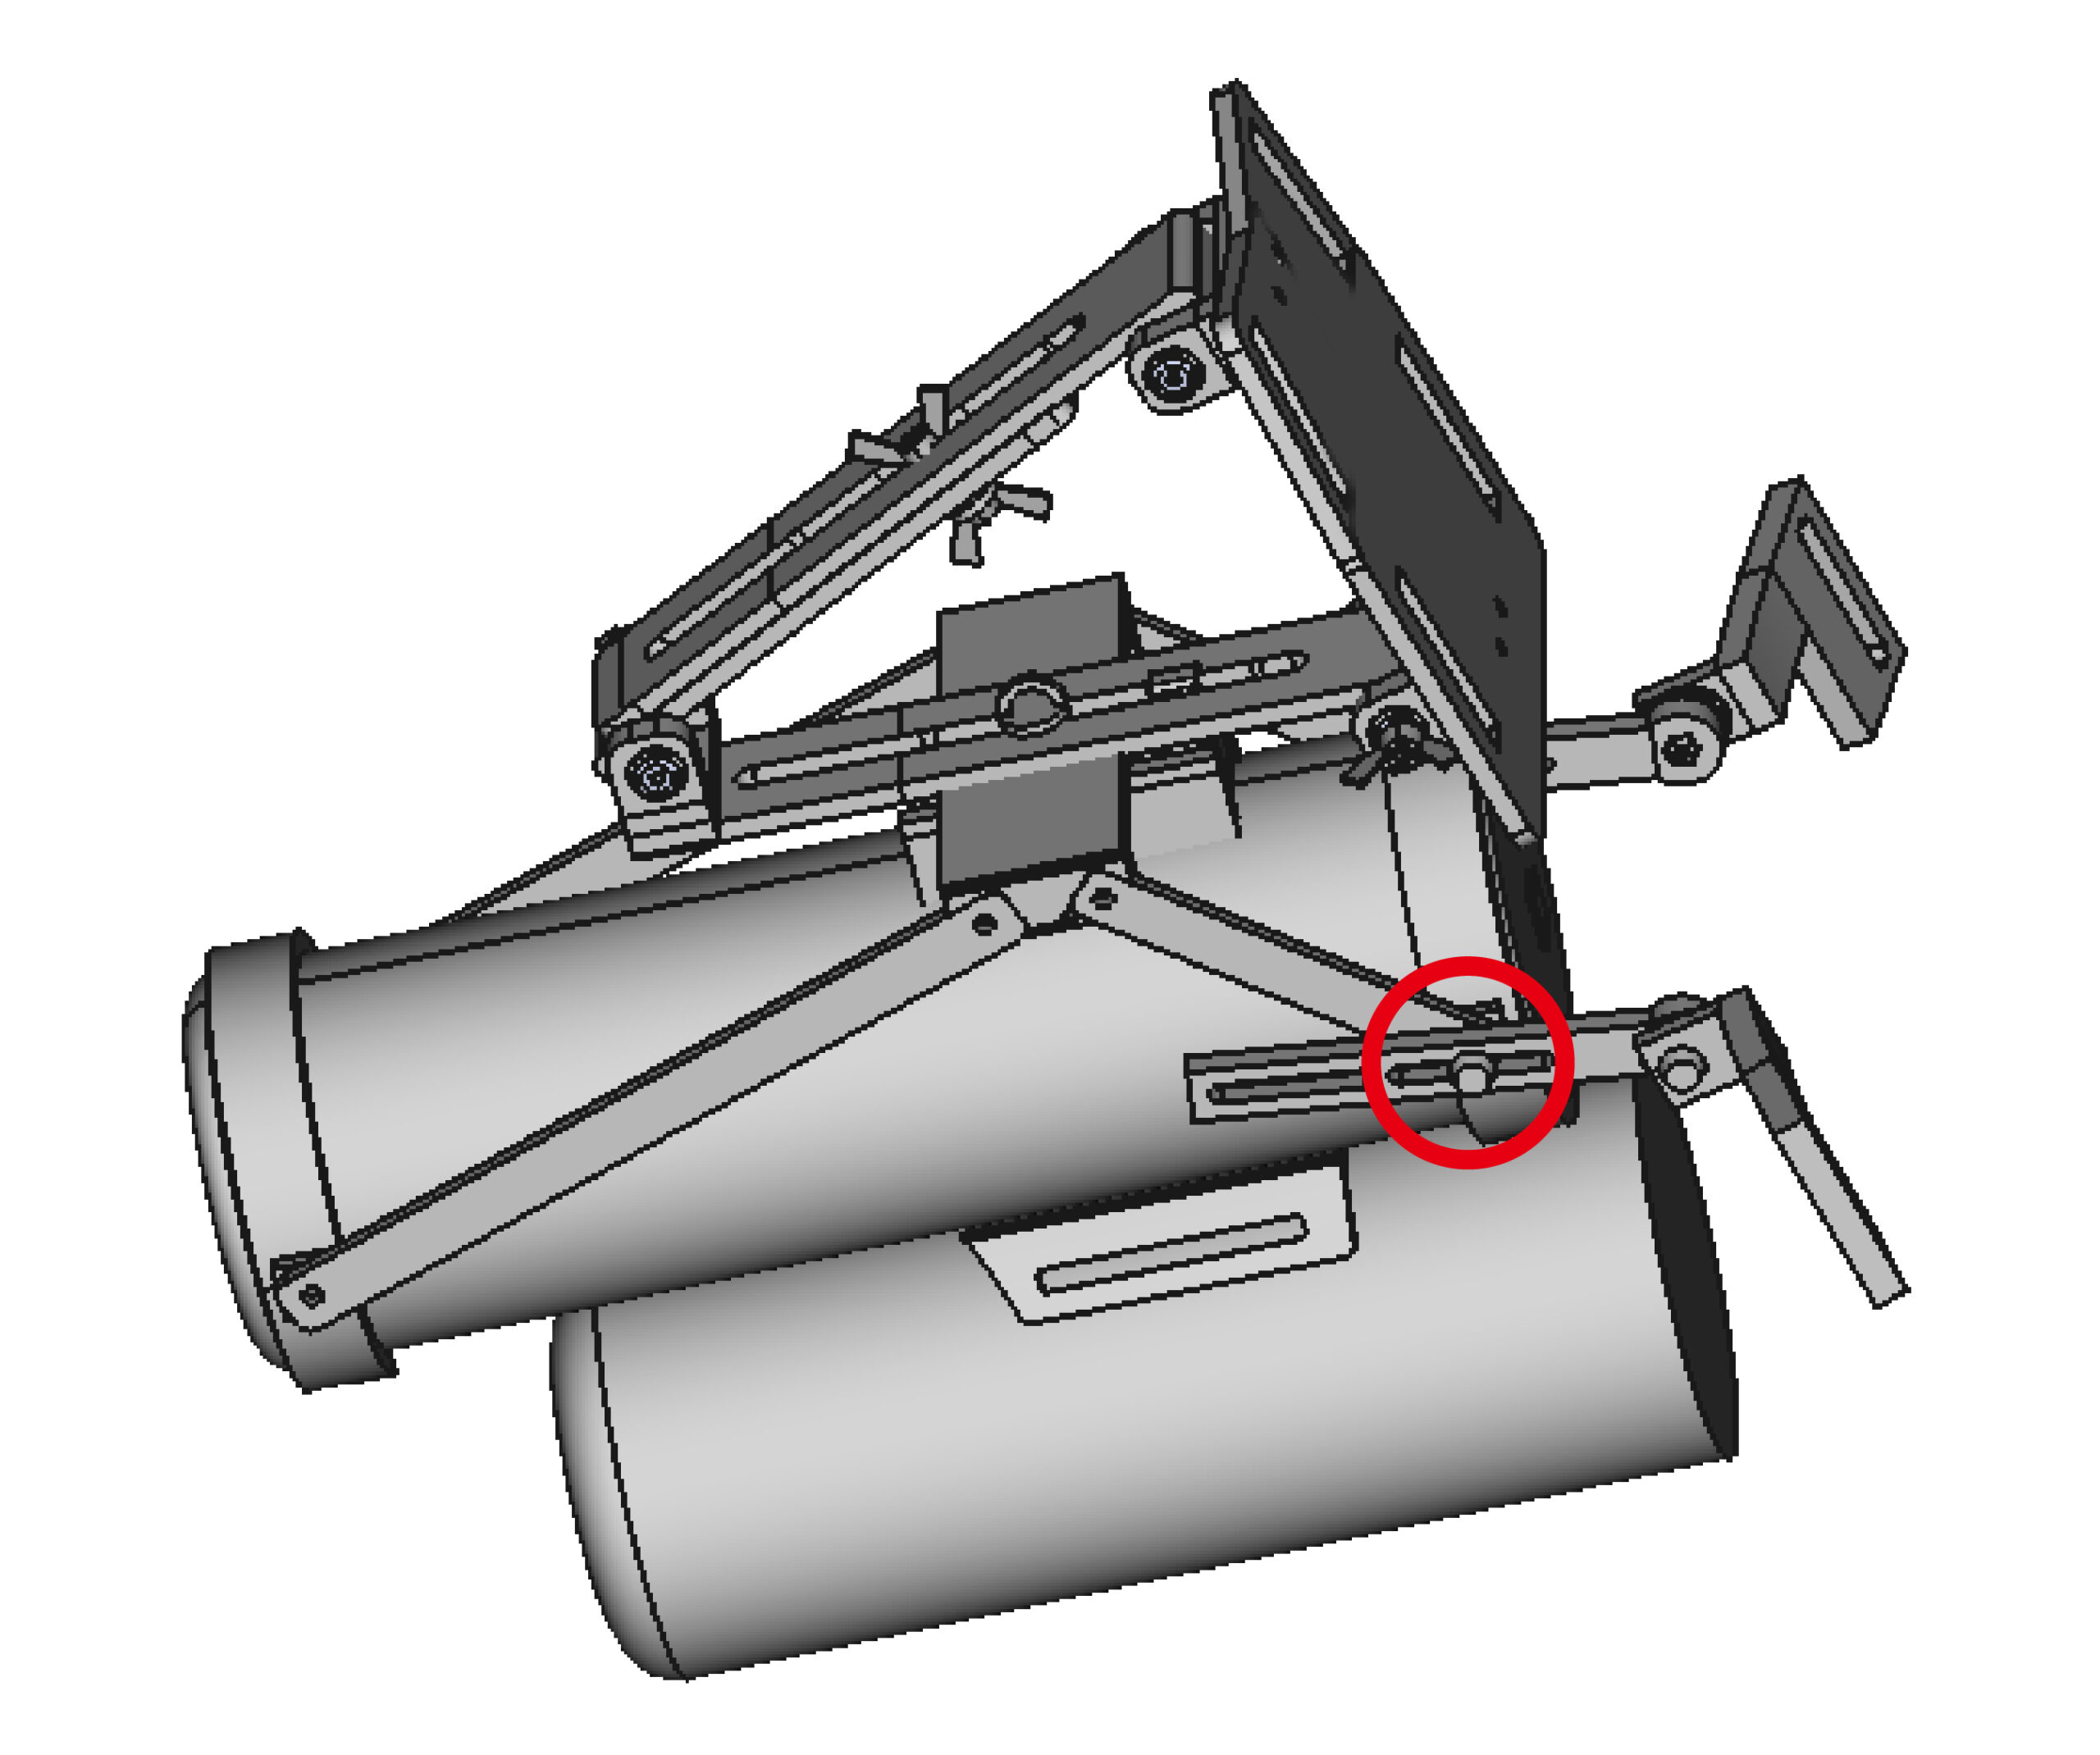
⑩ Assemble the support pillar at the bottom of the body plate as shown in the diagram below.
(M4 60mm bolt)
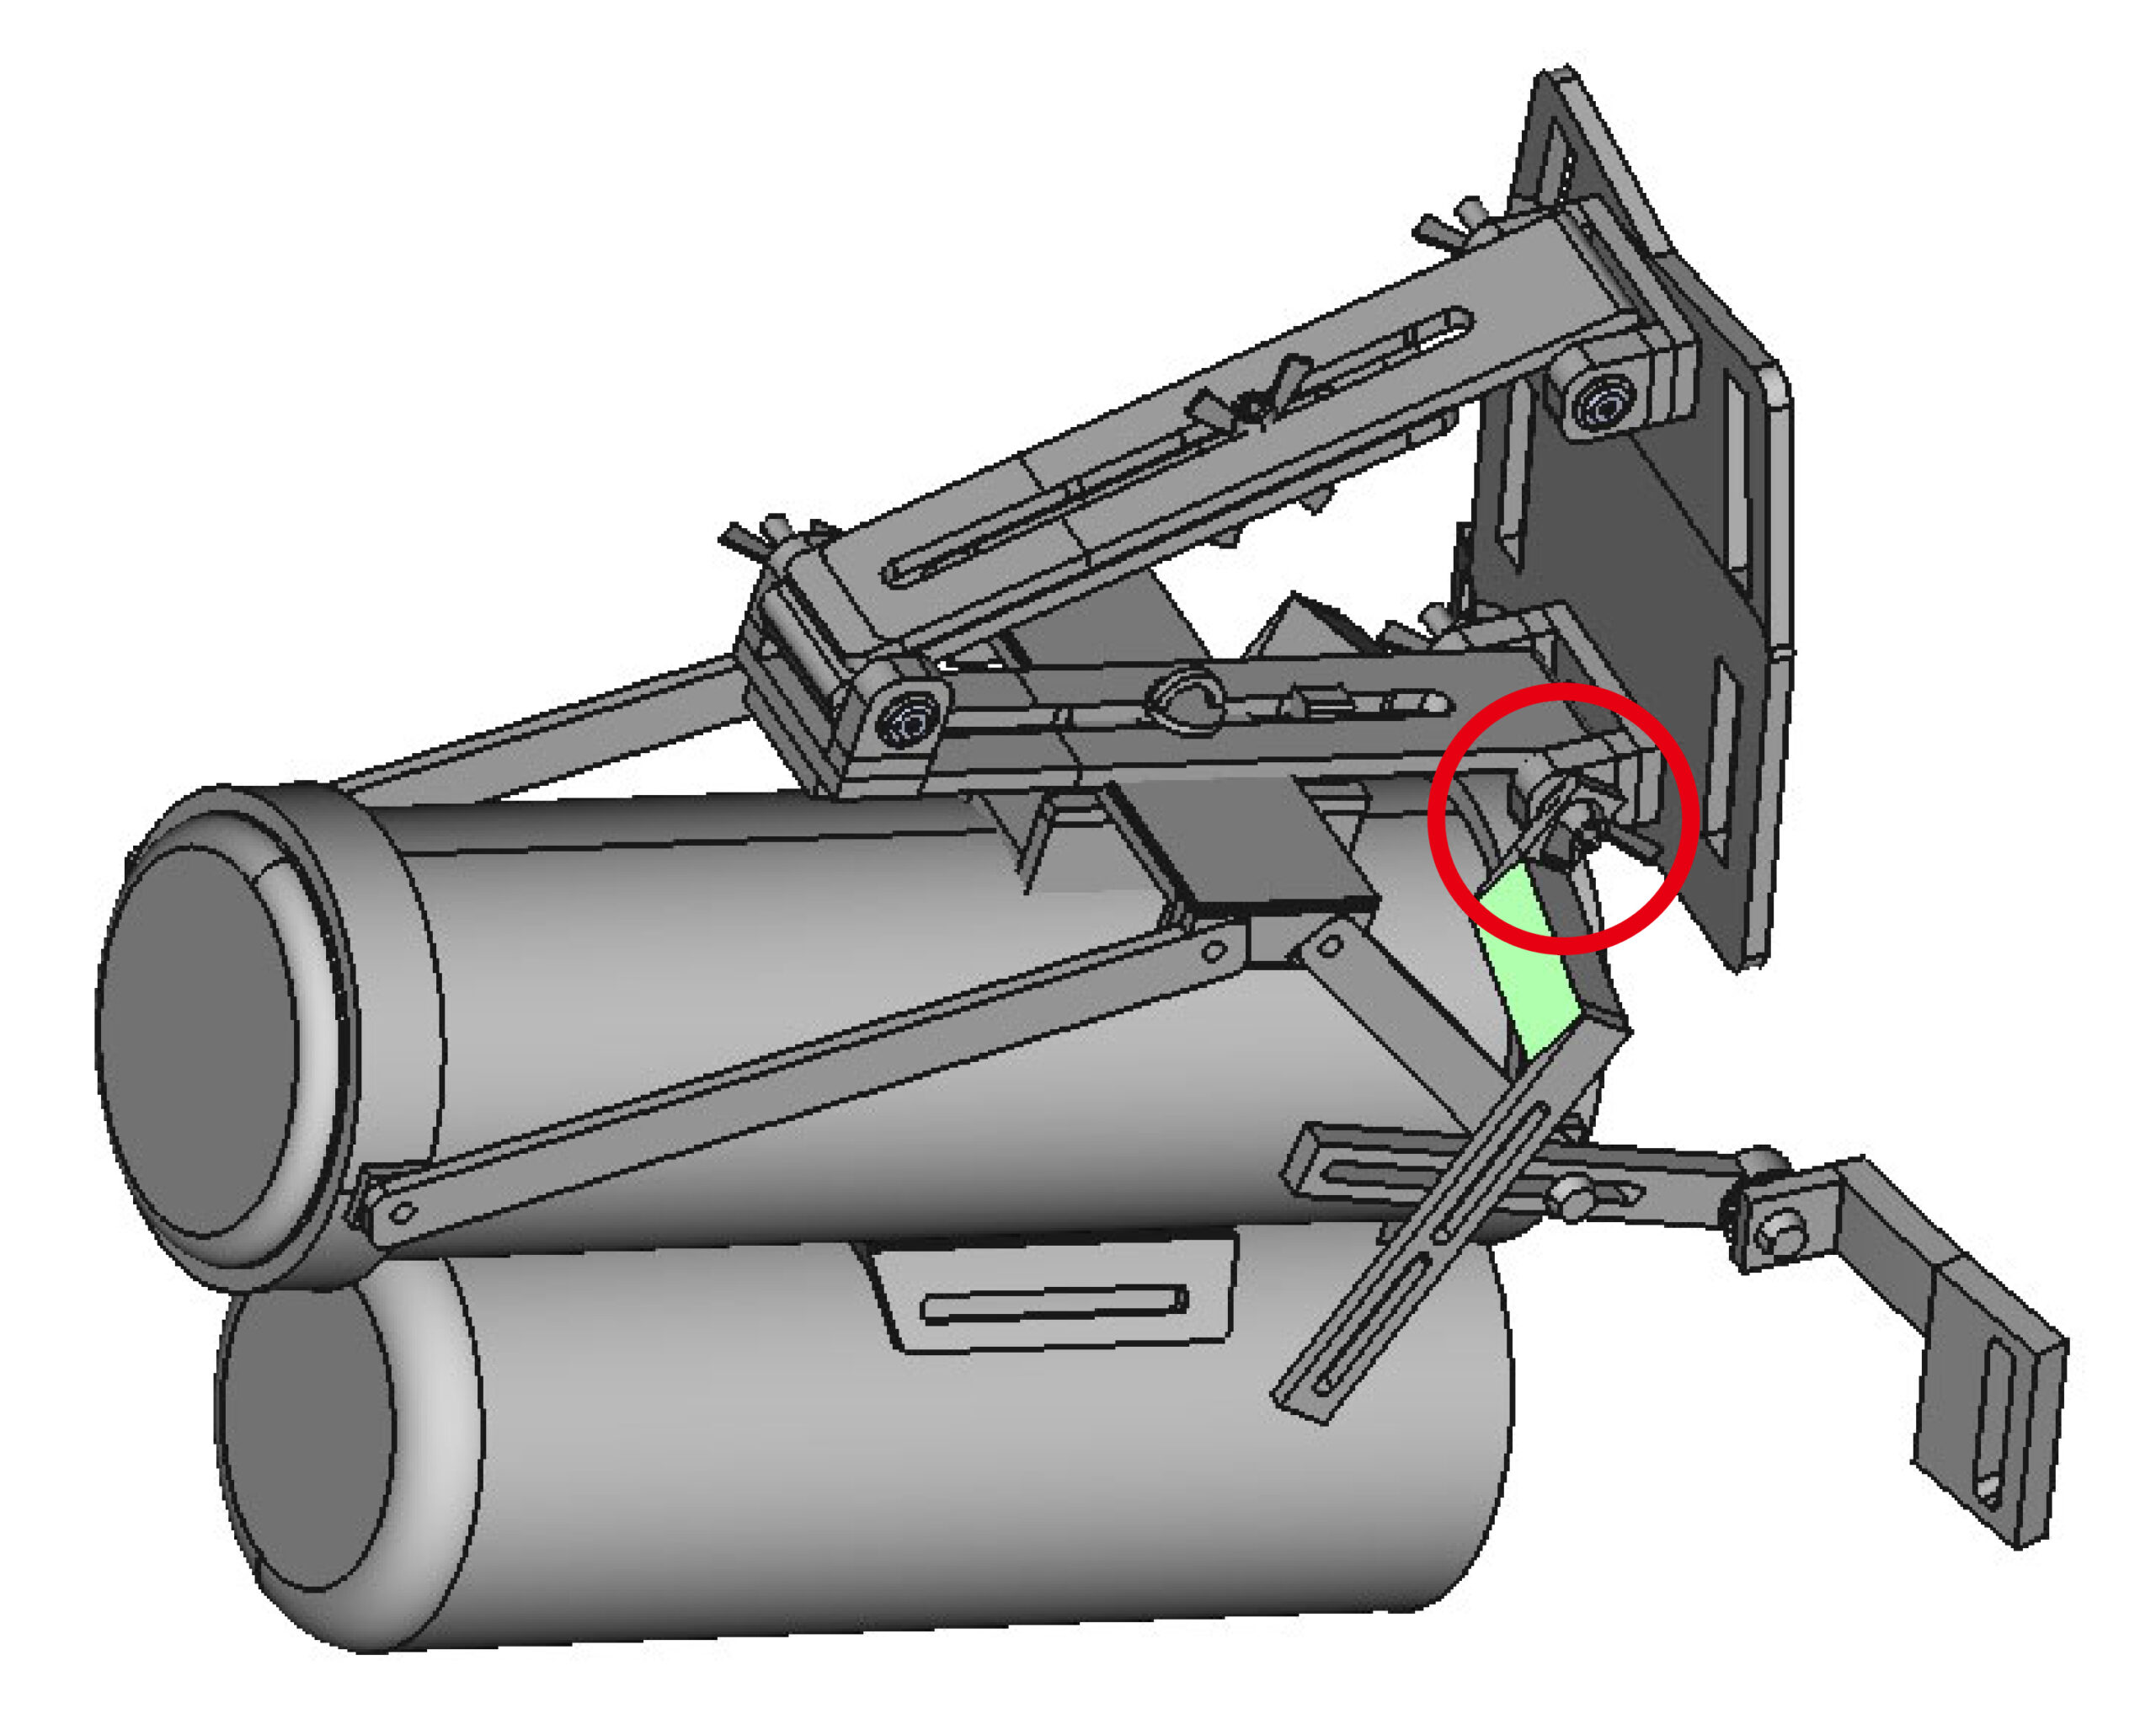
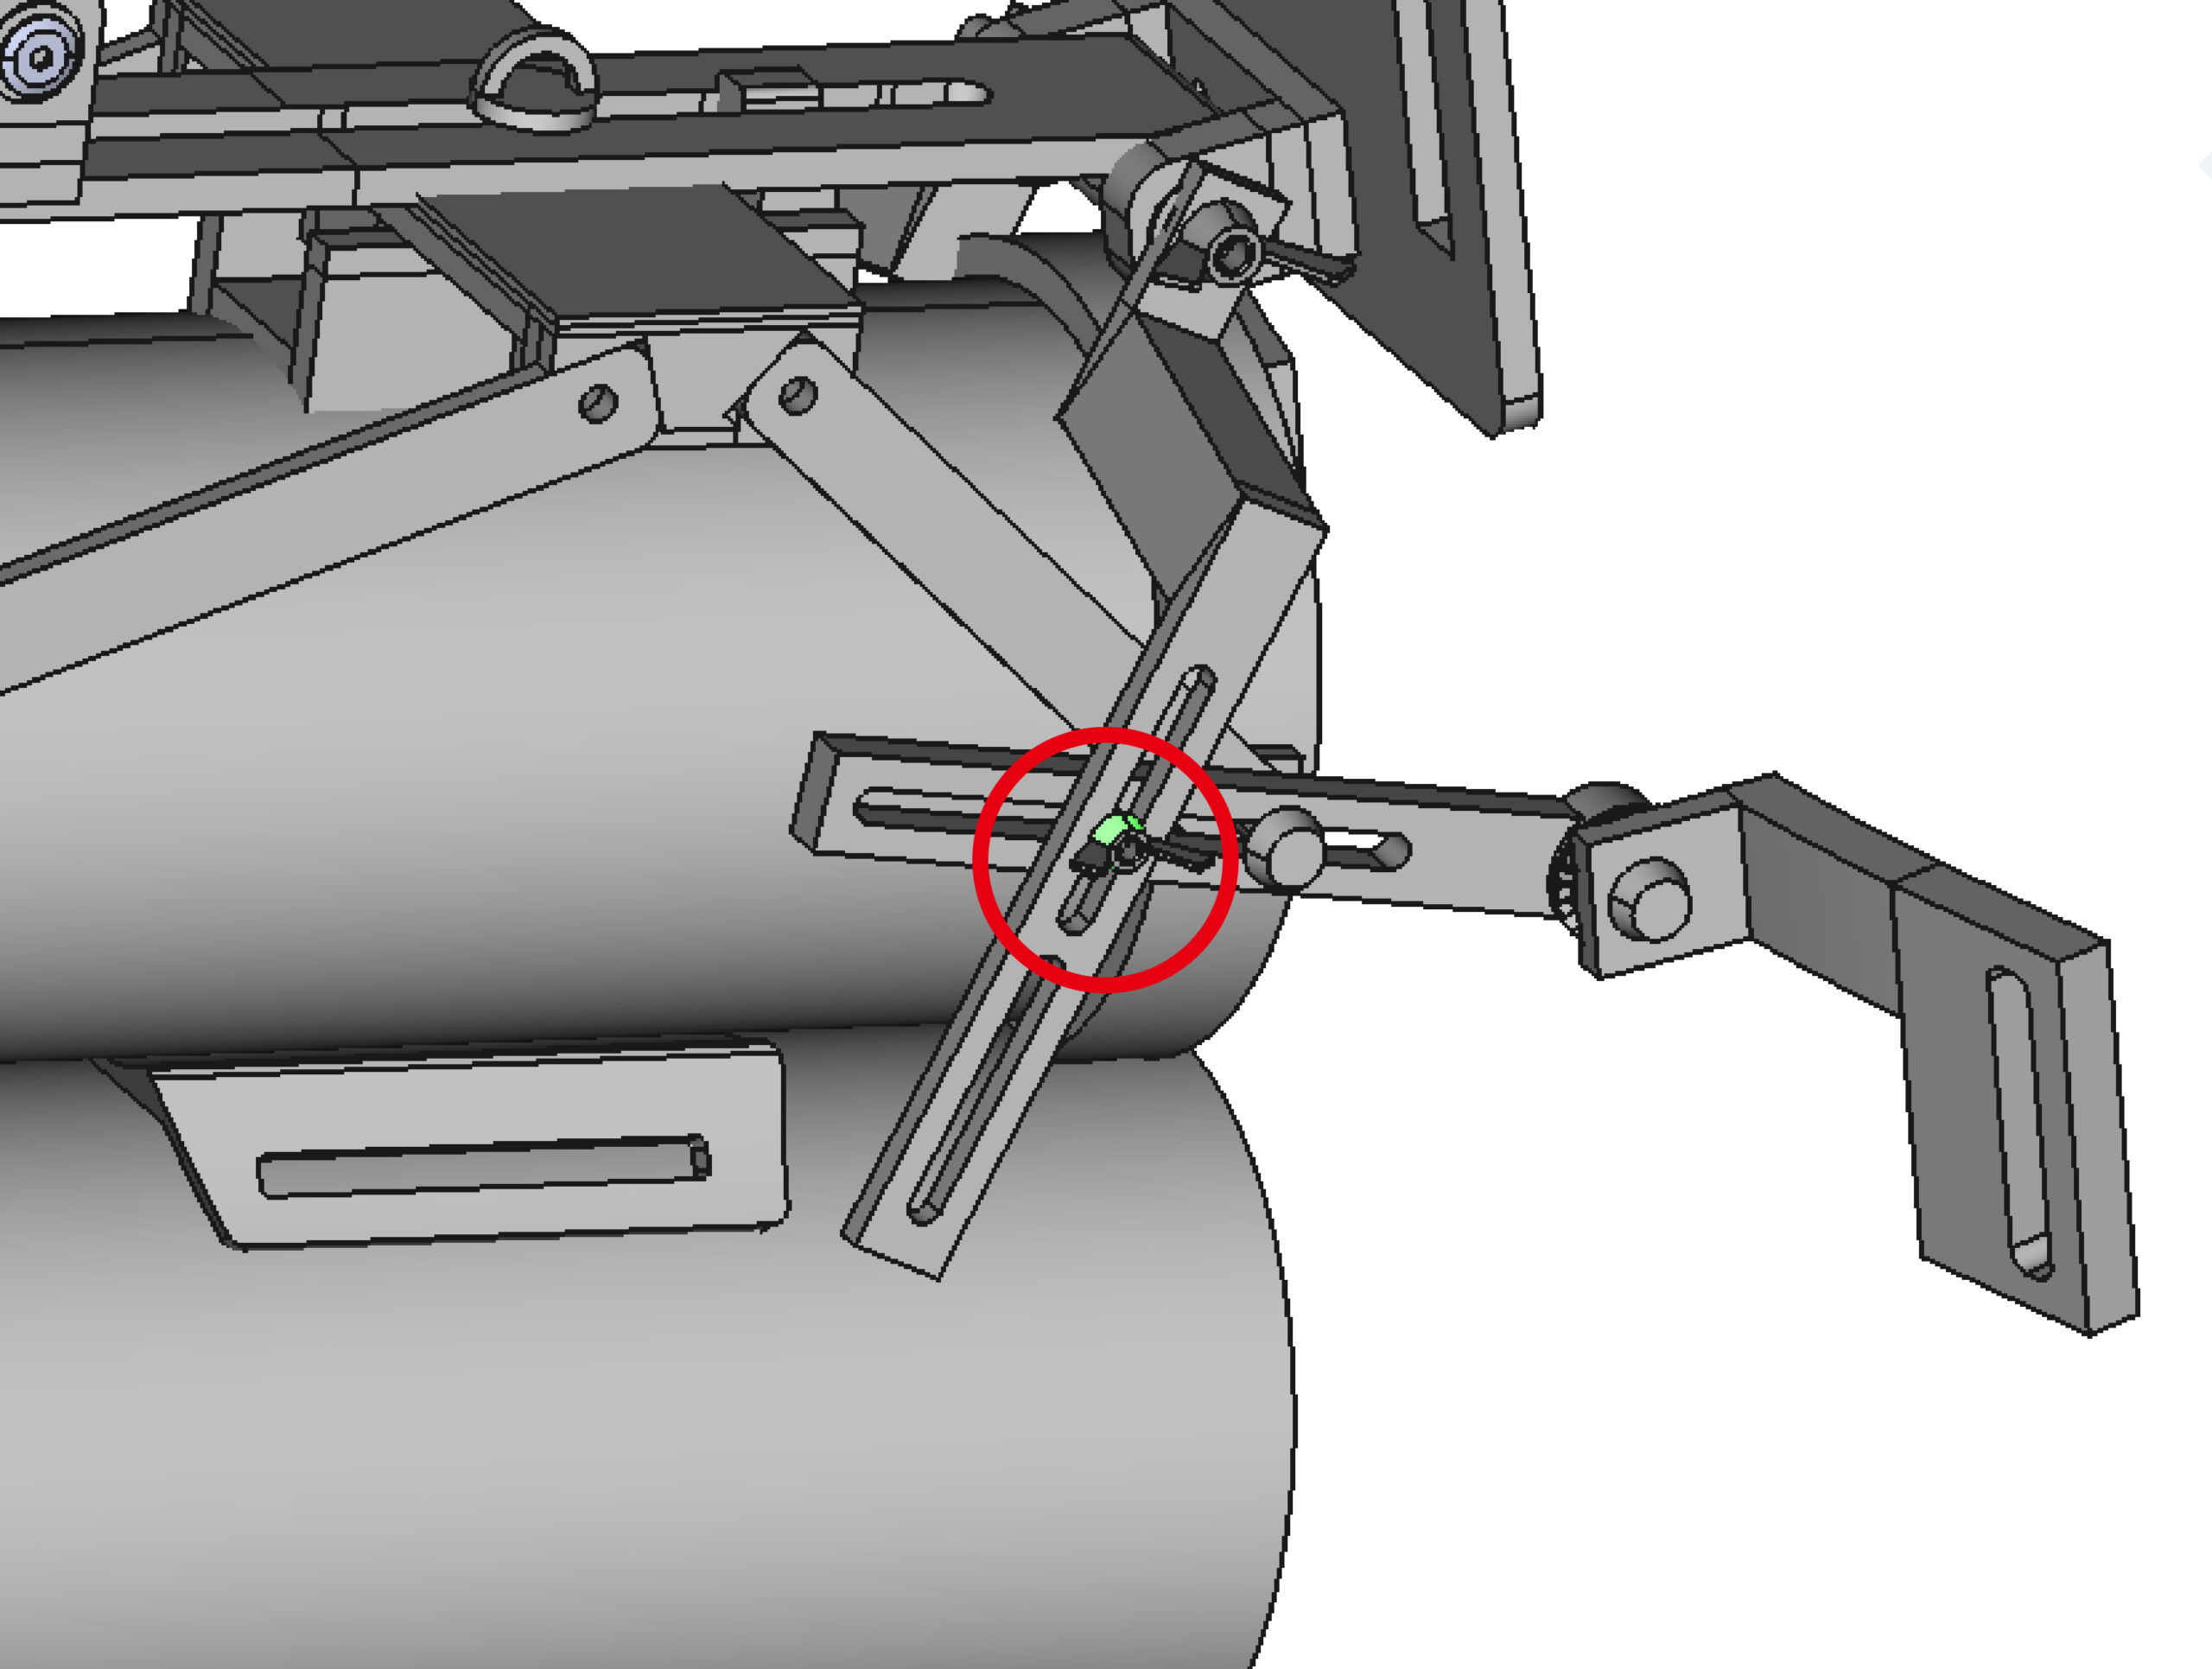
⑪ Use a 16mm M3 thumbscrew and a wing nut to fix the position shown in the diagram.
***********************************************
Tweak each screw to get it to the position you like,
then tighten each wing nut.
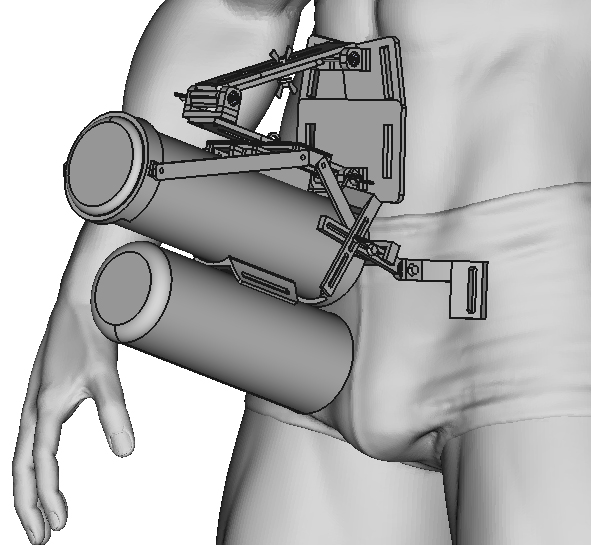
This completes the process.
There is a wide range of adjustment, including upwards, downwards, close to the body, and away from the body. Secure as desired with each thumbscrew.
If you are attaching it directly to your bare skin, please devise measures such as pasting sponges or gap tape on the body plate and the parts of the left and right stabilizing legs that touch the body.
If you can’t help but sway due to your belly, it might be a good idea to tighten it up with a firm waist supporter (corset) and attach a hands-free device over it.
It would also be a good idea to not attach the upper support plate made in step 5, use only one belt on the top, or It’s also quite nice to make TheHandy shake. (This is my personal opinion)
Please see the Common matters in the manual.
+++++++++++++++

Comments